I told you that I was going to tell you how to make these easy-breezy-lemon-squeezy little pumpkins. So listen up. You don't even have to get out your sewing machine. I did all of these in about an hour and a half, that's one and a half episodes of Martha Stewart, y'all.
Okay, so here goes. Cut out a circle of fabric. No matter what size circle you cut, you are going to get a pumpkin about half the size. I had this shiny orange fabric that I bought on clearance when WalMart was closing out their fabric department so I got it REALLY CHEAP! So trace out a circle. I used an embroidery hoop but you could use a plate, or a lid, or whatever.
Then you want to take a running stitch around the perimeter of the circle. Turn it under as you go, so there will be a nice hemmed edge. Hint: I use hand embroidery thread, it's just a little stronger than regular cotton thread. If you use a heavier fabric such as burlap, you might use a jute or even a dental floss.
Pull your thread tight, gathering around. Stuff firmly but not too tightly with fiberfill and anchor stitching by back stitching. Its okay if a little hole is at the top.
Now you need to cut three pieces of ribbon. The length is going to vary, depending on the size of your pumpkin. Here's what I did: I measured double the diameter of the embroidery hoop that I used and it worked out just fine. Fold the three pieces of ribbon in half and tie a knot there. That knot will be the center of the bottom. I used a pin to hold it in place until I was finished tying it on top.
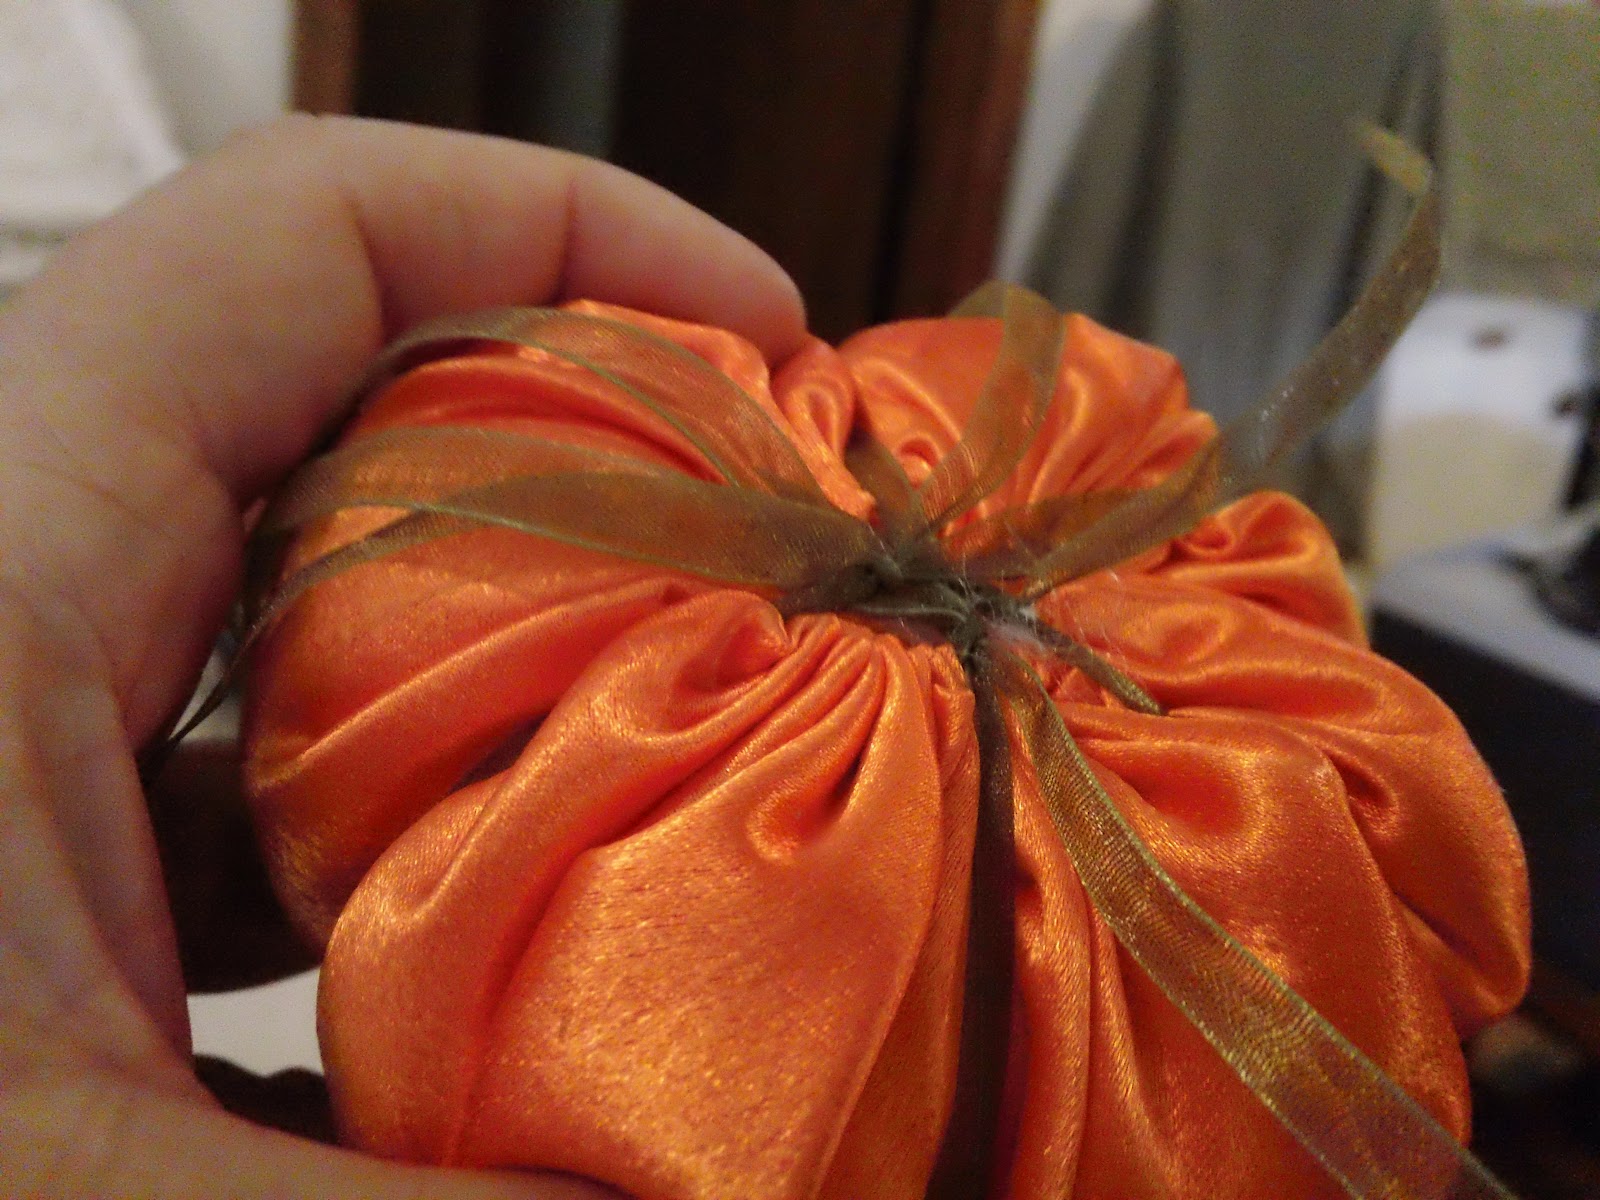
Take the opposite ends of ribbon and pull tightly around the top of the pumpkin and tie in a knot. Do this three times, dividing it into approximate sixths. The bottom will look similar to the above picture.
This is what the top will look like. Then just finish it off. I gathered up some small sticks from the yard and made stems, simply by breaking them into 2 inch pieces and gluing them on top. Just push it down in that little hole that is up there. Then add whatever garnishments you like. I put a bit of moss around the stems and glued on a fall colored leaf. I also used the blade of my scissors to curl the organza ribbon that I used. (Some ribbon does not curl well so you can either leave it straight or cut it off) Voila! You have cute little pumpkin to add to your centerpiece, trim a wreath, or fill a cubby or bowl
Hope you got all that! Even little Angel was studying up on this! lol
Try this out and get a bit creative! You can use gingham fabric, and maybe use jute instead of ribbon and trim with a rusty bell. Make some smaller, some larger, and fill a washtub with them on the front porch. Tie a tag on them for placeholders.
More later, my bloggie friends.....