

Another wreath....

I also did these cute little piggie chalkboards.

The other thing that I finished up were Santa Paintbrush Ornies. I have been doing these for about ten years, and they sell like crazy.
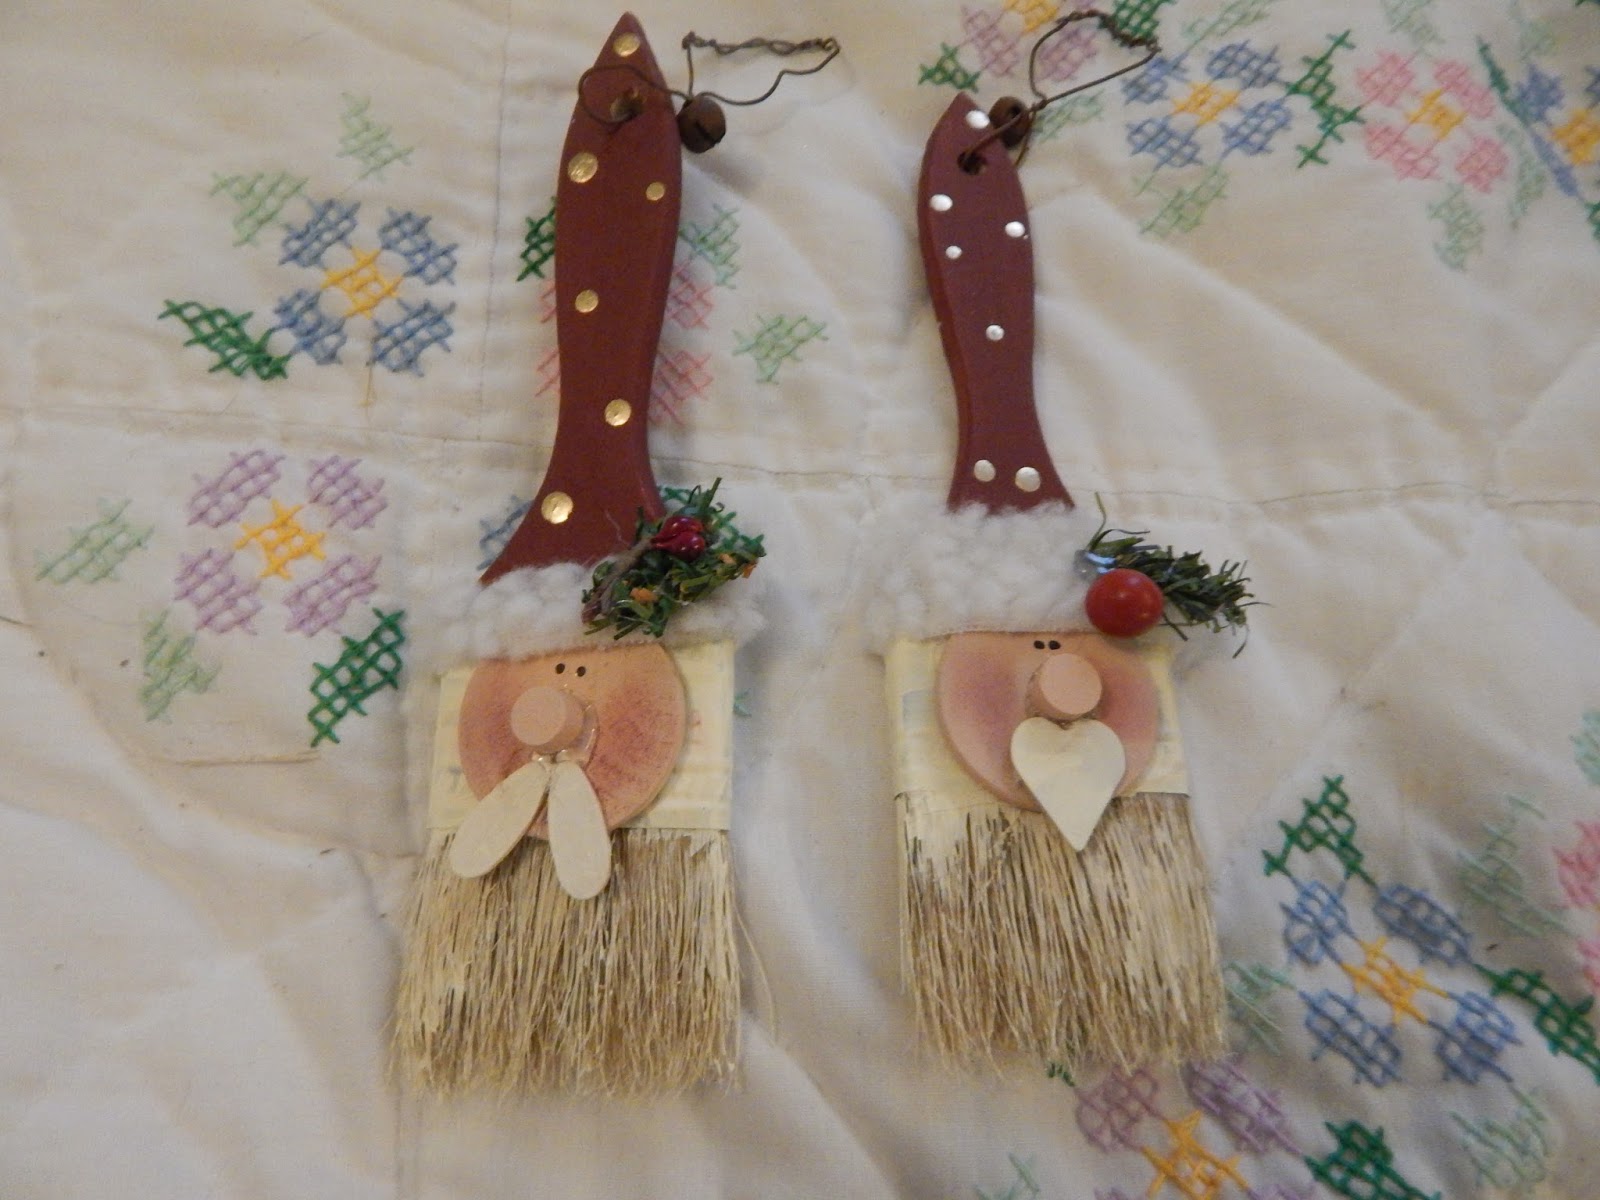
These little guys are easy to make but they do take a little time. First get all your supplies together.

I use a two inch chip brush. These are really inexpensive. I buy mine at Harbor Freight where I get a huge box for around $15-$16. In addition, you will need acrylic paints: flesh tone, light buttermilk, barn red. Gold paint, powder blush, small wooden noses, woodsies for the mustache, wooden discs for the faces, sharpie, greenery trim, blush, brushes, glue gun, hot glue, and pliers/wire cutters. Also some rusty wire and bells and some white or off white fleece.
Since I make a bunch of these at a time, I start by painting the wooden part of the paintbrush with barn red. You can use any red that you like. I prefer a bit more prim. You will want to paint one side and let it dry. Then paint the back. While the one side is drying, paint the wooden discs, and tiny noses with flesh tone paint. You don't need to paint the back but you should paint the sides. Paint the woodsies with light buttermilk. You can also use any shade of white or off white that you like. These woodsies come in a package of mixed shapes and sizes. I use teardrops, stars, triangles, hearts, etc.
Paint the metal part of the paintbrush light buttermilk and pull the paint down into the bristles. Let it dry. Flip the brushes over and paint the back with the barn red and light buttermilk like you did on the front. Don't forget to put some paint in the hole at the top of the brush. Dot the front side with gold paint by dipping the end of your paintbrush into the paint and dabbing on.
Let this completely dry. Now comes the fun part! Assembly. With your hot glue gun, glue the disc to the center of the metal part of the brush. Glue on the nose and the "mustache". With a sharpie, make two dots for eyes. Using a paintbrush, apply dry powder blush on each "cheek". I apply it heavily and then blow of the excess. Cut a piece of fleece (I used a textured fleece that kinda looks like fur) about an inch wide and long enough to wrap around the top of the face and glue in the back. Add your embellishment. I used a small piece of greenery and a couple of berries.
Cut a piece of wire and stick it through the hole at the top of the brush. Thread on the bell. Twist the wire into a circle for hanging. This is where you will need your wire cutters/pliers. And you are done! I display them in an old enamel bowl.

What is a woodsies?
ReplyDelete