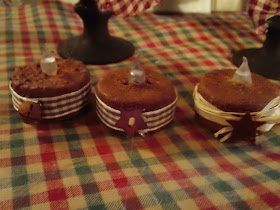
These are the cheapo plastic candlesticks and tea light that you can pick up for next to nothing. I got the tea lights at the dollar store and the candlesticks (they came with the light bulbs) in the package at Goodwill, two candlesticks for $1.
Look how they turned out!
 You can do this too. Here is what I did. I dipped the bulbs in tinted silicone and let dry overnight. (see prior post for how-to) Then I took apart the base and the candlestick. The white candlestick part was coated with ModPodge. Then I rolled it in cinnamon. I put about three coats on. Then I finished it up with a light coat of modpodge. Don't put it on too heavily or it may not dry clear.
The metallic base was painted with flat black. I used an acrylic craft paint, but you could spray it on if you want. I gave it about two coats and then I mixed some cinnamon in with the black paint so it adds some texture. Some people might use coffee grounds for this, but I love the cinnamon smell and it is easy to work with.
Once everything is dry (try to let it set overnight....I know, I know...I was anxious too) and then assemble. I finished it off with a homespun bow and a little rusty star.
The tea lights are easy too. Here is a how to:
 First, and this is really important: Cover the little light on the top with tape. I couldn't find my painter's tape.....tho hubby says he didn't take it.....so I used cellophane tape. It was a little hard to get off, so next time, I will press a bit harder on the location of the tape. The tea lights were about the same procedure, though I added cinnamon to the modpodge for the last coat to get some wax-like clumps. Finish with a light coat of modpodge just to seal it. I did not do this on the bottom because you have to turn it on and off there.
When they are all dry trim in whatever you have on hand. I used ribbon on a couple, raffia on one. Then I used a bell, a button, and a rusty star to finish them off.
I love the way these turned out so I will be making so many more. These will sell really well at shows! Hope you like them too!


No comments:
Post a Comment
Leave me a comment, a thought, or a giggle!