Find my Patterns on PatternMart

PatternMart.com
Showing posts with label tutorials. Show all posts

Monday, February 25, 2013

Let it snow!

More snow this weekend.....No wonder I am having a hard time thinking about Spring.  We celebrated my grandson's 16 birthday yesterday.  He is such a sweet boy.
Today, since I just can't seem to get going on my spring stuff, I finished up some candy canes....yes, candy canes.  Another dollar store find, these plastic candy canes come six in a package.  But they are that ugly cheap looking plastic.
I wrap them with whatever I have on hand.  The red and black check is an old flannel shirt of my husband's that I cut into strips.  You can see old ribbon and homespun.  I like the primitive look, but you can use what ever you like.  If its bright colors that you like, use those.  You can even wrap with muslin scraps and then add a colored ribbon to simulate the stripes.
I like to start on the bottom or straight end.  Put a little dab of hot glue and hold a corner of the fabric over the end.


Wrap the fabric or ribbon on the diagonal, being careful to overlap each wrap so the plastic cane doesn't show through.  When you get to the end, put a little hot glue on the tip and fold in the fabric.  Trim as needed.

Here are several that I finished up earlier today.
I used fabric, wired ribbon, paper ribbon, etc for these.  Experiment with them.  This is also a great craft for your kids or grandkids.  Just make sure you substitute the hot glue for a white glue (it'll take longer to dry) or you do the gluing.  And just a little Martha Stewart tip, keep some cold water in a cup or small bowl when you are using the glue gun.  It really helps to dip your fingers in it if you get some hot glue stuck to the tips.

Now, if you didn't stock up on the candy canes during the holidays like I did, just be patient.  Put this little tutorial on your pin board, or bookmark it for later.  If you can't find candy canes on line right now, the dollar store will start selling them again in October.


Tuesday, December 6, 2011

Tutorial Tuesday

This is a really short tutorial today on how to make this beautiful rustic garland.

Very simply, you need to purchase the lights (strand of 20 at Dollar Tree is $1) and weave in to a strand of garland.  They have garland at the dollar store, but this is some that I had on hand after purchasing after Christmas last year.  I think I paid around a dollar for it, but it was too large, so I cut it in half.  Next, I added these cute little bells that I purchased at Dollar Tree, 12/$1.  So it took two packs.  They come in silver and gold tone, but I wanted to make it rustic so I painted with a brown primer.  When dry, I used a needle nosed pliers and punched a hole in the back big enough to fit over the mini lights.
Just be careful not to make the hole too large, or it will fall off the lightbulb.  (If that happens, just add a little glue to hold it on)

Just slide over the bulb and there you have it.  This could also be done on a wreath, or you could rag tie a garland on a strand of lights (more on this later) or you could leave in the original finish.  Maybe add glitter to the bells before putting on the lights.  The possibilities are endless!  This would look great on a mantle, sideboard or down the center of your table.  Have fun with this!

Wednesday, November 30, 2011

What cha working on Wednesday????

So, I know I promised to post yesterday, but some things just are outside of my control.  I did take some pictures of some of my holiday decor.  This is my favorite piece of furniture in my whole house, my Hoosier cabinet.
I know that the pic isn't the greatest, but over the years, I have collected nearly 400 Santas, santa ornaments, and decorations referencing Santa.  I always fill my Hoosier with them as well as my curio, my shelves, my window sills, etc.  I will work on better pics for the next post.

Now, for that craft idea.  Many of you know that I love to shop at Dollar Tree.  Well I found these bags of 6 candy canes there.

Next, I tore muslin into strips about 3/4" wide and wrapped it around the cane.  In the opposite direction, I wrapped red ribbon.  You could use green or any other color, or use a check (like I did) stripe, etc.  Be creative.  Then embellish!  I tied on a string or cord hanger too.

As a tradition, I gift each of my children and grandchildren an ornament each year.  My mom used to do it for my kids.  She always said that when your child became an adult and moved out, they would have a memorable start to their own tree.  These little ornaments can do double duty.  I attached a key tag that you can find in any office supply store and wrote the name and year (one on each side) on the tag.  These can be placed on their dinner plate as a place holder as well.

There can be a lot of variations to this simple craft.  You can tea stain the muslin and tag for a more rustic look.  Instead of ribbon, you can use narrow strips of fabric.  You can use a spray adhesive and add glitter (or brush on mod podge).  I just wouldn't place a glitter ornament on a dinner plate.  You can use metallic fabric and ribbons to add a bit of glitz.  You could glue on beads, sequins, etc.  In other words, GET CREATIVE! 

Lastly, I finally got a link from Colorado's Best so if you missed my segment here it is: 


Monday, July 25, 2011

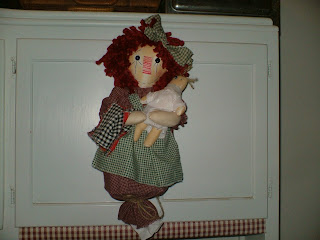
Finished second tissue holder

Here are a couple of pics of the second tissue holder that I finished up last night!  I just love them!  Can't wait to make more!  You can purchase either of these items from my Etsy Store: www.etsy.com/shop/3peas2010 .