Find my Patterns on PatternMart

PatternMart.com
Showing posts sorted by relevance for query wreath. Sort by date Show all posts

Wednesday, September 19, 2012

Tuesday Tutorial

 Okay, as promised, here is the Tuesday tutorial, even though it is Wednesday. 

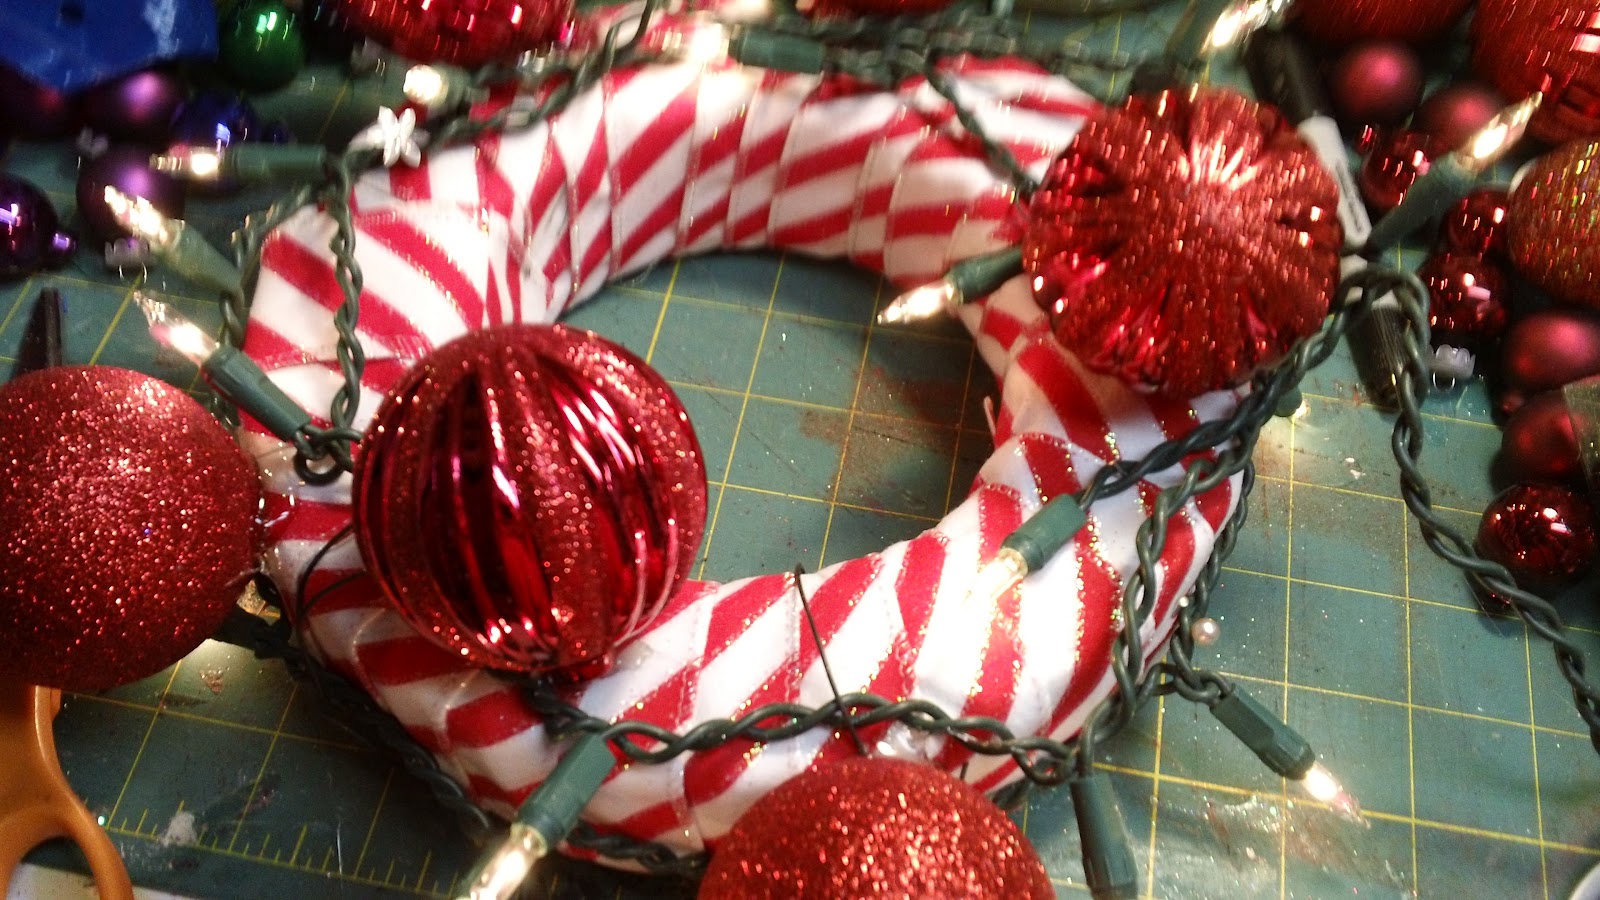
To make a beautiful wreath, to use either as a lighted centerpiece, a mantle decoration, or a door hanging, you will need some ribbon, one of those green foam floral wreaths, a small string of lights, and some assorted Christmas balls, bells, floral, etc.

Start by wrapping your ribbon around the wreath.  I get my floral wreaths at Dollar Tree, for, you guessed it, $1.  I used some leftover ribbon that I had but if you don't have a stash like I do, shop the dollar stores or use a coupon for either Michael's or Hobby Lobby.  You could even use a non-raveling fabric like fleece or felt cut into strips.
Either pin or glue the ends once you are finished wrapping the wreath.  Don't use hot glue....no, no, no!
I used a strand of 20 lights and wrapped around the top and the inside of the wreath.  Use wires or pins to hold in place.  You do not want to wrap the wreath on the underside or it won't lay flat.  Then take your balls, bells, etc and start filling in.  I start with the largest balls and put them on first and then fill in with small balls, bells, and even some floral picks.  Your goal is coverage withoug burying your lights.  I hot glue my ornies on, but if you want you can use t-pins or wire. 
I think it is best to decide before you start on a color scheme.  I chose gold and red, but you could use gold and silver, blue and purple, red and pink, etc, etc.  Oh, I always take the hangers off the ornaments before glueing them on. 
I like my wreath on a table top.  Here I am showing it displayed with one of my frosted jars.  You can use a jar candle, candlesticks, a vase with flowers, etc.  The possibilities are endless.
I put a bow on one end, so if I want to hang on the wall, it will look like a regular wreath.  Here are a couple of hints:
  1. Don't make it too matchy, matchy.  In other words, make it interesting.  Change up sizes and textures.
  2. Some of my red balls were found at a garage sale and there were a few little nicks or scratches.  To hide, spray a little adhesive on the whole wreath and lightly dust with glitter. 
  3. Cover glue globs with small bells or floral leaves.
  4. If you have a bunch of glue strings, use a hair dryer on a low speed.  It will blow them away and give you a more polished look.
Thanks for your patience, my friends.  Follow my blog so you don't miss out on upcoming tutorials!

Wednesday, August 1, 2012

What 'cha workin' on Wednesday

Well, you know how I love pinterest.....you could spend days there, just looking around, getting ideas....Well, anyway, I found these cute little ornies that I'm calling Away in the Manger.  I made a few changes, just to make it my own, and if you want to make them, you could do the same.
Here is what you need to make these:  mini grapevine wreath, wire, some kind of trim (I used a little wooden star) a head or a small ball, some fleece, and some straw or moss or excelsior.  I also used some card stock to put under the wreath to keep everything from falling through.

Cut your cardstock by making a circle about the size of the wreath.  I traced a jar lid and it was perfect.  Take your felt or fleece (or even flannel will work) and cut it into 2 1/2" squares. 

Cut one of the squares in half and roll it up for the body.  A spot of glue will hold it in place.  Then glue on the cardstock to the bottom of the wreath.  Just kinda look to see which side is flatter and use it.  This is something that I decided to add.  The ones I saw on Pinterest didn't use this but they used alot more excelsior and, its just me, but I thought it looked a little sloppy.

Press the card stock down firmly and turn it over and let it dry, wreath side up.

 Now you want to make your baby Jesus.  I showed you how to make the body by rolling up the fleece.  Glue on the head.  I just happened to have these little heads in my stash.  If you don't, or if you think they look  a little creepy, make your own.  A flat-sided ball, or a half ball will do the trick.  Just paint them with some flesh toned paint and add dots for eyes.

Lay the baby on the  fleece as shown above, and wrap him burrito style in the fleece.  Glue some moss or excelsior to the dried wreath and add in baby Jesus.  (You will want to glue him down)  Cut some wire for the hanger.  I used about a 10" piece of black wire but you can make it longer if you want more little curls on it.  I secured mine to the wreath and then curled it by wrapping it around a crochet hook.  I glued it on and there you have it, your Away in a Manger ornament. 

Again, make this your own.  I had to glue a bit of the fleece to the top of the head because there was a hole in it.  You could paint on a little bit of hair.  You can use some straw to fill in the "manger".  You could wrap the baby in homespun.  Instead of black wire, you could use rusty wire.  Instead of a star, you could glue on a heart, or put on a tag. 

Enjoy!

Sunday, April 2, 2017

Spring shows, best sellers, and a tutorial

The Unique Boutique show was a success despite a spring snow storm.  I sold my birdcage, both wooden bunnies, two lighted garlands and sold out of the bunny ears candy.  I am setting up on Wednesday for my last of two Spring shows:  Grandmother’s House Spring Boutique, Jefferson County Fairgrounds, 15200 W 6th Ave Frontage Rd, Golden, CO 80401 Thu Apr 06 - Sat Apr 08.
I don't have a pretty flier for this one, but it is sure to be a great show!  I have been doing shows for this organization since 2001, although I have never done a spring show.  Since I sold so much at the last show, I made up a few new items.  This little wreath was easy.  I bought a bag of floral at the thrift store and the wreath was inside.  The glittery egg was part of a yard stake that I had broken.  I wired the egg to the wreath and added a bow....
 More floral from the thrift store.  This is a bunny, who somehow remained naked after I dressed so many and I purchased three of these wall pockets at the thrift store for $3!  I took a little sand paper to them to shabby them up a bit.
 Another wall pocket....

 And the third one.....
 I bought these next two containers months ago from the $3 bins at Target.  The first will go out in the fall.....foliage I bought on clearance after Thanksgiving.

This is the other container that I purchased at Target.  All of the floral come from the Dollar Tree!
Okay, so this is a Pinterest hack.  Talk about easy.  I was going to do a tutorial on this but time got away from me.  So here is what I did....I always save all of my hub's scraps, so I had a few 2 x 4s laying around.  I just sawed them into different lengths and painted them white.  I have a BUNCH of burlap, so I made myself a template and cut out some ears.  I zig zagged around the edges because this stuff ravells like crazy.  I added some pink checked fabric for the inner ears, leaving the base open.  I put pipe cleaners up inside so the ears would stand up.   I painted wooden hearts and wrapped thin wires around an old paintbrush to make it curly and glued on.  Blushed the cheeks, painted the eyes and glued on some pips and ribbons.  Easy Peasy.....
I have had this old sleigh laying around for a while.  Just simply added a big bow and bells.

I bought this washboard from Michaels, unfinished and on sale.  I stained it, made a pip wreath, stapled on some burlap and a bow.
Another Pinterest hack.  These little bunnies are made from brown kraft paper and contain jelly beans.

If you want to make them, here is an easy tutorial:
You will need kraft paper, a scissors, pinking shears for paper, tape, ribbon, pompoms, jelly beans, sewing machine, pen or pencil.

     I buy kraft paper by the roll at Dollar Tree.  It is great to cover surfaces, to wrap gifts with, and to use in crafts.  I used a template that I had (you can find one free on line) and traced several on a double thickness of the paper.  You can also use paper bags, scrapbook paper, etc.
I cut them apart, leaving enough room around the edges to work with.  I also taped the edges since my rolled paper tended to roll.....duh
I started sewing the two sections together at what would be the bunny's neck, sewing inside of the markings about 1/4 of an inch.  
This lets you finish on the biggest part of the bunny, the bottom.  Before you get all the way around, leave a section open to push in the jelly beans.  I fit between 6 and 8 in  each one.  But this is where it gets a little tricky.  If you don't push them away from your pressure foot, you will tear into the paper....voice of experience speaking.  And I have to warn you, dollar store paper is cheap, thus, tears easily.
Once sewn, use your pinkers to cut off your markings.

Glue on the pom pom and bow.

This is a fun little project and will look cute in anyone's basket.  Or how about a gift for those co-workers, etc?  You could use chocolate instead of jelly beans.  You could make them out of pretty pastels instead of brown paper.  You could use raffia instead of ribbon.....and the list goes on.

Things I learned:
  1. Dollar Store paper tears easily and tends to roll.
  2. Use a bigger stitch on your machine.
  3. Backstitch as if you were sewing on fabric.  It anchors the stitching.
  4. Hot glue can get messy.
  5. Never use sewing shears on paper!
Have fun with this little project.  And if you are hanging out this weekend, come by and see me!

PS.  Squishy Grandma is down 18.6#!

Tuesday, February 24, 2015

Happy Birthday to me!

Today is not my birthday, but this is truly my birthday week.  My daughter, Brandi, used to celebrate the week of my birthday every year.  She would bring a diet coke to work, leave me a sweet message on my phone, send me cards, or simply call and tell me she loves me.  I miss her so much!  But now, I treat myself to some sweet little indulgences.  On Saturday, hubby bought me a new camera.  So now if my pictures are horrible, you can blame the photographer, not the camera!

I have been pushing myself for some spring items.  Its hard, since we have a foot of snow on the ground.  I made this oh, so sweet, rag wreath:

These are so easy, and if you sew alot like I do, this is perfect for you.  I had purchased a Christmas wreath last year, primarily for the pine on it.  I cut all the pine from it to use on my wrapped candy canes.  I kept the metal form and simply tied these scraps of fabric on it.  The fabric is cut about 8 inches in length and an inch or so in width.  I cut all my small scraps into rag strips for use in wreaths and garlands.....which brings me to my second project:

These are the same fabrics that I used on the wreath and are simply tied to a 20 strand of lights.

I also finished a couple of dolls:

And five pillows!  Here are a couple of them:
I also made some "Don't snicker" Easter bars, some textured tea lites, and some peat pots.  I have several bunnies in process.  So, I guess they won't be finishing themselves.  Better get busy!

Thursday, May 19, 2016

New Centerpieces from Old Treasures

Still working on getting through my thrift store finds.  I love finding little gems and turning them into new treasures.  I found this sleigh for $2.  I transformed it into a sparkly centerpiece with foliage that I had on hand.
 Santa's Express has a snowman perched in the top.
 I love this little Radio Flyer Sled.  It looks really cute with the candle and snowman.
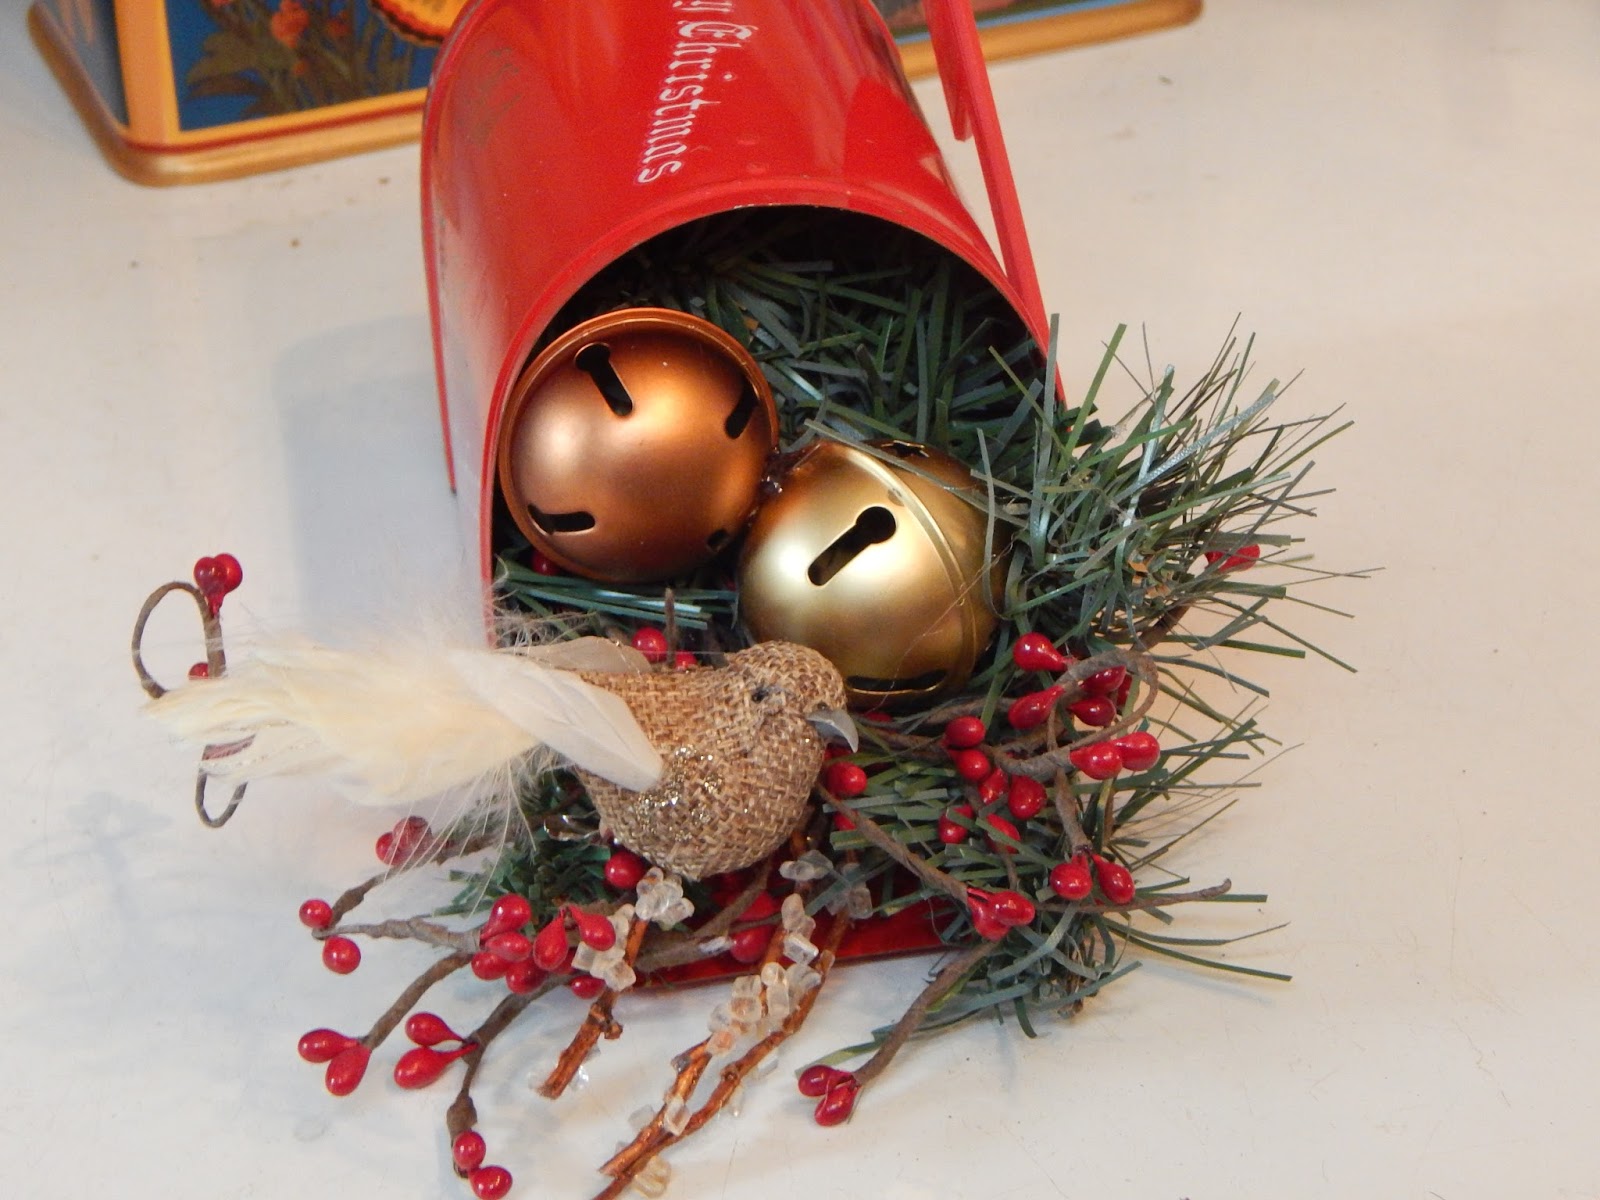
 This little mailbox has become a festive nest for this little burlap bird.
I also found this cool wooden snowman at the thrift store.  It was unpainted and pre-drilled for the lights.  I only paid $2, and the original craft store price of $9.99 was still on it.  I painted it and added the lights and a few embellishments:
I always like to embellish wooden pieces with cloth, buttons, bells, etc.  It gives the piece more dimension.

I purchase ornies for my wreaths at thrift stores, garage sales, and after Christmas sales.  Same with the ribbon.  So I finished up another wreath:
Wanna know how to do this?  You can find my prior tutorial here,  The prior tute was for a lighted wreath.  If making one that is not lighted, just omit that step.  The other difference is that this wreath is wrapped in tinsel instead of ribbon.  Either works!  Have fun with this one!

And finally, I saw this on Pinterest....my foremost and favorite time waster ever (not a bad thing!)
Snowman Glasses.  Use as ornies.  I am still working on packaging for these.  What do you think?
 Still working on that pattern....Guess I'm the kind of gal who likes instant gratification.....So off I go to the studio!

Wednesday, February 24, 2016

What 'Cha Workin' on Wednesday??

Well, here it is, Wednesday again and I am still working on Holiday stuff.  This week, I completed a few more fun projects.  In addition to last week's crackled angel, I finished up two more:
These candlesticks are smaller and had small bases.  I screwed on some wood bases before finishing them so they wouldn't get top heavy.  I had these wooden wings in my stash, so once they were painted, I put some ModPodge on them and loaded them up with glitter.  I like the contrast of the rustic crackle with the glitter.  The heads are round wooden balls, simply painted, eyes were dotted and blush applied.  I added a snippet of lace trim for a collar.  The haloes are a bit over the top, but in lieu of hair, I really like them.  They are a couple of small candle rings that I bought at the thrift store on one of my many trips.

I also have been raggin' it.  I made a fall wreath and garland.

As I have told you many times before, this is a great way to use up some of those scraps.  And it is one of the simplest of all crafts.  I like to work on these while I am watching television in the evening. (keeps my hands out of the cheetos, too)  The garland is simply a strand of 20 mini lights.  I buy these up during the holidays at Dollar Tree.  The wreath is actually a ring off of a busted tomato cage.  Then you simply tie on the rags.  I try to keep the strips between 1/2-1 inch wide by about 7 inches long.  If the strips are a bit shorter or longer, no worries.  You can trim off the long ones and the short ones just give it some depth.  When I am collecting my scraps, I use gallon bags.  I divide into three bags:  pastels (for spring wreaths and garlands) warm colors like golds, greens, browns for fall applications, and of course reds, greens, whites for holidays.  When my bag is bursting, I tie some garlands!  I sell these out every year at $12.99 each.  And actually, I have only $1 in the garlands.  It does take some time, but what else would I be doing????

I kind of got off course with my crackle items, huh?  I actually did find some wooden salt and pepper shakers at the thrift store that I made into snowmen.
After these were crackled, all I really did was add the face and scarf and glue on the noses.

A couple of years ago, my sis gave me this basket.  She had purchased it with some pips in it but they were all damaged.  I had plenty so I removed the old, added the new along with some stars and moss and Voila!  A great piece for your table, mantle, or night stand!
Well, my peeps, enough for me today.  This is my birthday week so I will have the whole clan over here this weekend.  Love seeing the grand-babies!  Have a great week!

Tuesday, July 31, 2018

So, I have been playing with Chalk Couture today and even though it is WAAAAY outside my comfort zone, I made some videos that will hopefully answer some of the questions I have been getting about this new product.  I tried to post to this blog, but the file was too large.....so, please have a look.  It's on my facebook page: www.facebook.com/3ppod.  And while you are there, follow me.  I would so appreciate it!

In addition to the chalk couture, I have been busy making ornaments, wreaths, and Santas.  The ornaments are some little metal utensils....look like measuring cups to me, but they aren't...so of course, I saw round and thought snowmen!
 I really like this fall wreath. 

One of the Chalk Couture items that I finished.  This is dual sided and turns.  The other side says Kitchen's Closed and has a pic of a cow. 
I have three crescent Santas cut out.  These are my best sellers and I have been doing them for over 20 years.  Also working on finishing up my desk/chair (you can see it in the photos).  I have some touch up and waxing to do.  See.....the desk is a chalkboard!

Off to finish my video upload....taking forever.  Lesson learned: Turn off the TV before recording.